ASP.NET Core MVC – Form Tag Helpers
Introduction
We already talked about Tag Helpers, we mentioned some of the most used Tag Helpers and we also talked about caching Tag Helpers. In this post, we will talk about form Tag Helpers.
HTML or Web Form is used to collect an input from the user using various HTML elements like inputs, checkboxes, radio buttons, dropdown lists, etc. When using the <form> HTML element we are usually talking about POST request, even tho we could use GET. However, GET is recommended for short, non-sensitive, amounts of data usually used to fetch some data based on provided parameters.

There are quite a few Form Tag Helpers that ship with ASP.NET Core MVC. Let us see what some of the most important ones do.
Form Tag Helper
ASP.NET Core MVC adds a CSRF protection maneuver whenever we are using <form> element. It generates a hidden Request Verification Token to prevent CSRF.
Here is a simple example:

This code generates the following form:

However, that’s not all, what happens behind the scenes:

Do notice the __RequestVerificationToken that works in combination with a built-in attribute[ValidateAntiForgeryToken], in HTTP Post action method. Furthermore, the method was marked as a post.
Another thing that Form Tag Helper does is that it provides the asp-route-{ParameterName} attribute, where parameter name is added to the route values. Hence, it also provides a cleaner alternative to @Html.BeginForm and @Html.BeginRouteForm
If we add a custom route:

And then change our form to following:

We get the following HTML:

It will do the same thing as the last one with action and controller specified.
Instead of using old HTML Helpers syntax:
@using (Html.BeginForm("Edit", "Categories")) {
}
we use:
<form asp-action="Edit" asp-controller="Categories"> {
}
First one might even seem shorter and better, but second is more natural and for someone who works as a designer who works on the FrontEnd as a JS developer, working with Angular or React, this will feel much more natural.
Input Tag Helper
This one is quite simple and it’s an alternative to @Html.EditorFor(m => m.Name)
Assuming we have a view model that has Name property:
<input asp-for="Name"/>
will generate:
<input type="text" id="Name" name="Name">
Label Tag Helper
This one is also rather simple and it’s an alternative to @Html.LabelFor(m => m.Name)
It goes in pair with input Tag Helper:
<input asp-for="Name" />
<label asp-for="Name" />
Just like all the others it has IntelliSense and will detect names of properties once you start typing:

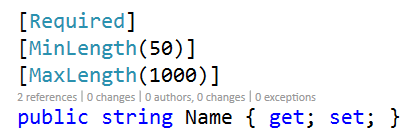
If we have Display attribute applied to Name property

here is what we would get in HTML:
<label for="Name">Category Name</label>
TextArea Tag Helper
This one is very similar to input Tag Helper:

and the following Razor code:
<textarea asp-for="Name">textarea>
we would get the following output:

Validation Message Tag Helper
We use validation message Tag Helper to display a validation message for a property of our view model. Using it is quite simple:
<span asp-validation-for="Name"></span>
we got the following HTML generated:
<span class="field-validation-valid" data-valmsg-for="Name" data-valmsg-replace="true"></span>